Search Newly Celiac

Showing posts with label celiac recipes. Show all posts

Sunday, 8 April 2012

gluten free sticky licky cinnamon buns


  • In a medium sized bowl mix:
  • 2 1/4 tsp yeast
  • 1 T. sugar
  • 3/4c. warm milk
  • 1/2 c. warm(not hot) water
  • mix well with a fork and set aside
  • In another medium sized mixing bowl mix:
  • 4 T melted butter
  • 1 egg beaten
  • 1 tsp  vinegar
  • 2 Tbsp olive or vegetable oil
  • 1 tsp vanilla
  • In a large bowl whisk together:
  • 2 1/2 cups all-purpose gluten-free flour (see note)
  • 1/2 cup potato starch (not flour)
  • 2 Tbsp white sugar
  • 1/2 tsp salt
  • 2.5 tsp xanthan gum
  • 1/4 c dry milk powder
  • 1 tsp baking powder
After yeast is foamy, add all wet ingredients (both medium sized bowls)  to the dry ingredients,
blend using your hands for three minutes (or a fancy stand mixer...sigh..I don't have one...YES it is totally sticky..make it fun ;)

Spray a round 9" pyrex baking dish or square 9x11 pan with Pam

In a medium sized saucepan mix:

4T. butter
1/2 c. well packed brown sugar
2T corn syrup (I used white either is fine)
1 tsp vanilla
after sugar melts...add 2 T milk or cream

Pour into pyrex bowl or pan

  1. Take a piece of plastic wrap about 2' long and lay it out on a slightly damp counter top, 
  2. Lay the dough on top of the wrap.  Lay another piece of plastic wrap over the top of the dough.
  3.  Roll the dough out (with the plastic wrap on top) to a square approximately 8″ x 16″.
  4. Remove top plastic wrap. 

  5. Filling:
  6. mix 2 T. softened butter (not melted) with 2 T cinnamon and 1/2 c. tightly packed brown sugar and 1/2 c. rehydrated (soak in hot water until plump) raisins.

  7. Spread filling mixture evenly across dough’s surface. Leave 1 1/2″ along one long side without any filling,
  8. so you can seal your roll.
  9. Starting along the long end, use the bottom sheet of plastic wrap to lift the edge of the dough and roll it up, forming a long cylinder. Start with the edge that has filling on it, that will be the centre of your finished rolls.
  10. Using a long piece of dark thread (light colours can be lost in the dough), cut the long “cinnamon bun log” into 8 pieces, about 1 1/2″ wide. You can do this by placing the thread underneath the roll, crossing it at the top, and pulling the threads so they cross each other, pulling it through the dough.

Place slices into the pyrex dish/pan and allow to rise for 30 mins

Bake in a 350 degree F /177 degrees Celsius until brown on the top and firm to the touch..about 30 to 35 mins.  Place a cookie sheet under in case it drips and lights the oven on fire like mine did :P  when the buns are done..place a cookie sheet on top and flip the whole dish/pan over so the sauce oozes all over, making sticky licky buns.  NOTE: if they are still a bit soggy on the bottom (rawish) then pop them in the oven (still upside down ) for a few mins longer :)  Enjoy!!!

Saturday, 7 April 2012

just like kfc...well close enough ;)


1 c. Bob's Red Mill all purpose baking flour, gluten free
1 T  baking powder
1/2 T. salt
1/2 tsp black pepper
2 T. paprika
1/2 tsp garlic powder
1/2 T. italian seasoning
1/2 tsp. ground ginger
1/2 tsp. sugar


Mix  ingredients in a ziploc bag. Dip your chicken pieces in milk, place 1 piece at a time in the bag and shake to coat.  You can bake this at 350 OR deep fry it as a real treat !!Yum !!  I fry until almost cooked and the transfer to the oven for the last bit. Cook it how you like it :)

Friday, 9 March 2012

Here we go!!!! TURKEY!!! and sandcastle stuffing :(

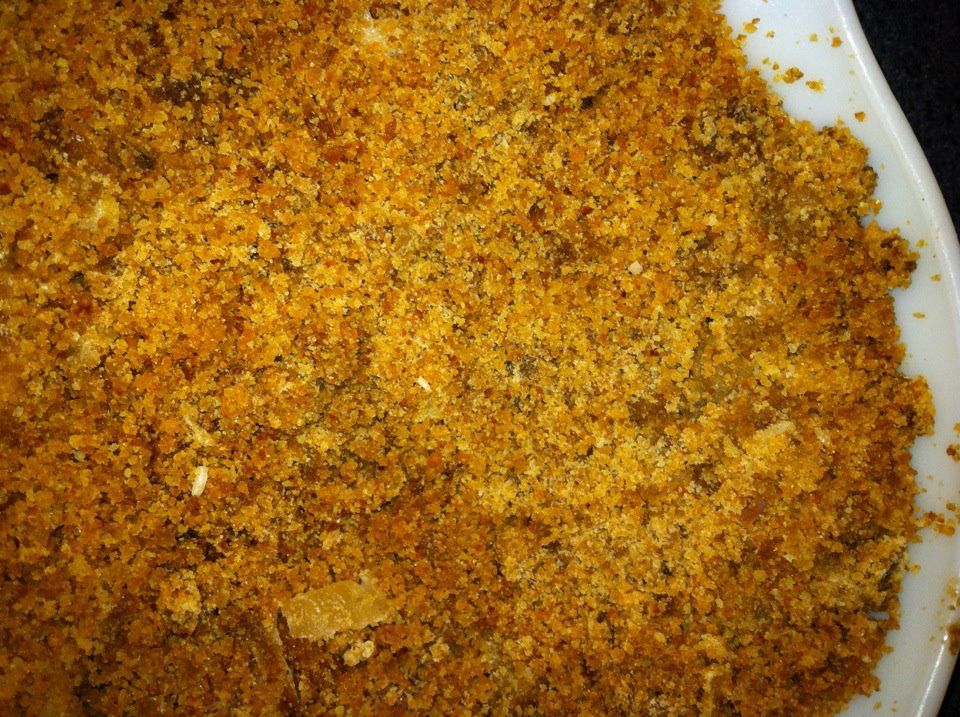
My family prides itself on the timeless stuffing recipe handed down through the generations...seriously...if people mess with the stuffing "THE DINNER IS RUINED!!!"   ;)   SO, since I am the designated turkey maker on holidays...  tonight I am making  the special recipe and crossing my fingers that it will pass as close to the real thing as possible...I WAS going to make bread and then toast it and grind the crumbs but I want to see if there is an EASY way to do it first... SO I bought rice breadcrumbs, (the same ones I use to make the AWESOME gluten free chicken/pork coating mix (like shake and bake only BETTER) and added a little extra butter (3/4 c. to two 500g packages of PaneRiso rice breadcrumbs plus seasonings).  I mixed the secret stuffing,  stuffed the turkey with the sawdust like material..closed it with skewers and prayed a little...
...well the result what pretty much what I expected...and you old-timers with this gluten free thing..are probably giggling at the gritty, sawdust-like stuffing I had to choke down...it eventually had about three cups of butter in it and I am sure we are all about to go into cardiac arrest...honestly, I have tasted better sandcastles...the turkey and gravy (used all purpose gluten free flour for that) and veggies were amazing...they call me the turkey master...but UGH  that  STUFFING!!!  I should not have been so lazy..EPIC FAIL...next time...BEFORE the Easter meal...I will bake the bread and make my own crumbs like I should have in the first place...sigh...maybe I can bread chicken with it...I will let you know...

Gluten free chicken coating ("Shake and Bake " )


I use the crispy PaneRiso breadcrumbs...mostly because they are the only ones I can find for less then $7 a bag...sigh...and dump the crumbs I think I will need to cover the chicken I wish to cook (about 1/4 c. per leg/breast...and 1/8 c. per thigh)  into a ziploc bag and add poultry seasoning, garlic powder (or salt ...if using garlic salt then just don't add table salt) Add about 1/2 T. per package of crumbs for each seasoning...and 1tsp of salt.  close the ziploc and shake.  Add a piece of chicken (this is especially nice when first dipped in gluten free Italian dressing),  close and shake the bag and lay on a foil lined cookie sheet.  Bake chicken at 350 until done (about 25 mins for 6 pieces of bone in chicken or until a meat thermometer reads 180 degrees Fahrenheit (82 degrees Celsius)  Cool for about 5-8 mins and ENJOY!!! My kids like this with gluten free alphabet shaped fries or mashed potatoes :)  To make chicken nuggets..just chop breasts into bite sized pieces and shake in the same manner :)

is was and always will be...gluten free

Remember those peanut butter marshmallow thingies we got at friend's houses at Christmas time ???!!! (Well maybe your Mom or Dad made them...mine didn't.. but I just recently found the recipe and it is SOOOOO  easy!!!  )

Peanut butter marshmallow squares:  (lol or Mini marshmallows with GRAVY)

In a medium sized saucepan melt over medium heat (use a double boiler if you have one)
      1c. KRAFT peanut butter (Kraft labels all of their products with a warning if they are not gluten free)
      1/2 c. butter (or margarine...I like butter :P   )
      1 whole 300g package Chipits brand butterscotch chips

Let this cool for about 10 mins
Spray some Pam cooking spray in a 9x9 baking pan
stir in 3/4 package KRAFT fruit flavoured marshmallows...about three cups
spread this mixture in the pan and place it in the freezer for 55 mins
set out for 5 mins to thaw and ENJOY!!! (they are good frozen too)

Saturday, 25 February 2012

FLUFFY BREAD FLUFFY BREAD FLUFFY BREAD!!!! woot woot!!!

This bread FINALLY tastes SOOOOO good...not a speck of rice around...

In a medium sized bowl:
Mix 1 packet rapid dry yeast or 2 1/4 teaspoons
with 1 1/4 cups warm water (not hot)
and 1 tablespoon sugar


In a large bowl:
whisk together your dry ingredients and set aside:
1 1/2 cups sorghum flour 
1 cup tapioca starch or potato starch (not potato flour!)
1/2 cup GF oat flour (I grind gluten free oats in a spice mill)
2 teaspoons xanthan gum
1/ 1/4 teaspoons salt


In another medium sized bowl:
Mix until frothy: 
3 tablespoons extra virgin olive oil
1/2 teaspoon vinegar
2 eggs
Add the bubbly yeast mixture to the egg mixture and then mix into the  dry ingredients.


Mix together with a fork for about 90 seconds until well blended
The dough will look closer to a muffin batter than bread dough, soft, but not cake batter wet.
move dough to a bread pan sprayed with Pam and allow to rise in a warm place until it doubles


Bake in a preheated 350 degree F /177 degrees Celsius for 40 minutes.
This bread is just as wonderful three days later <3.  Store in an airtight container.
adapted from a recipe by the gluten free goddess :)

Grind this bread after toasting to make gluten free stuffing :)


SCONE HEAVEN!!! Sorghum flour, your NEW BEST friend!!!

Success Success Success!!!  Thanks SO much to the gluten free goddess I have discovered the most AMAZING pumpkin Scone recipe..soft fluffy moist and lighter than your average scone...I substituted oat flour (that I ground in a spice mill from gf oats) for the millet flour and use potato starch (NOT FLOUR) WOW!  it was even VERY yummy the next day...it went FAST!

Pumpkin Scones Recipe:
1 cup sorghum flour
1/2 cup organic millet flour/oat flour
1/2 cup tapioca starch or potato starch (not potato flour)
1 tablespoon baking powder
1/2 teaspoon  salt
1 teaspoon xanthan gum
1/2 teaspoon ground cinnamon
1/4 teaspoon ground cloves 
1/4 teaspoon ground nutmeg
4 tablespoons organic light brown sugar
7 tablespoons cold shortening 
1/2 cup mashed cooked pumpkin or canned pumpkin
1 large egg
3 tablespoons real maple syrup
3 tablespoons milk whisked with 1/4 teaspoon lemon juice 


Instructions:


Preheat the oven to 350º F. Lightly grease a 9-inch Pyrex pie dish.


In a mixing bowl, whisk together the flours and dry ingredients. Add in the shortening by pieces and cut in the shortening (with a fork or a pastry cutter) and mix until the mixture looks sandy.


Add in the pumpkin,  egg, maple syrup and  milk. Beat the batter briefly until the dough forms a smooth mass. You do not need to beat the dough very long, just until it is mixed.


Scrape the dough into the prepared pie plate. Using lightly oiled hands pat and shape the dough into a smooth flat round. Press the dough all the way to the edges of the pie plate.


Use a thin sharp knife to score the dough into 6-8 wedges.


Bake the scones together in the pie dish.


Place the pie dish - or the baking sheet- in the oven. Bake until the scones are firm and slightly golden- roughly 20 minutes.


Cool the scones on a wire rack and make the maple nutmeg icing.


 Icing:


Use only a little liquid at a time as you beat the frosting. If it gets too thin, add more confectioner's (powdered) sugar. 


Ingredients:


1 cup confectioner's or powdered sugar
2 tablespoons pure maple syrup
1/2 teaspoon real vanilla extract
1 tablespoon milk
Pinch of nutmeg, to taste (start tiny, you can add more) 


Instructions:


Beat until smooth and add more milk a tablespoon at a time until the icing is creamy- but not too thin. Taste test and add more nutmeg if it needs it.


Beat the icing for three to four minutes (this improves the texture).


Spoon the icing into a pastry bag fitted with a simple tip (or use a plastic sandwich bag with a tiny hole cut in one bottom corner). Chill the icing while the scones are cooling a bit.


Squiggle the icing on top of the scones, or spread on the frosting with an icing knife, if you like a lot of sweetness adorning your scone.


Makes 6-8 scones.


SOOOOOOOO GOOOOODDD!!!!!

Thursday, 23 February 2012

pizza...yum...bread mix yuck..

Well the Celimix rice bread mix as a a bread was an EPIC FAIL at my house (no offence) BUT as a pizza dough it was enjoyed by all!!!  I mixed the recipe as printed on the bag..let it rise for a little bit (about 20 mins) and then used Pam cooking spray on my new pizza pans (a little splurge) and spread the dough (with copious amounts of rice flour on my fingers...)  added prego sauce and gluten free pepperoni (Freybe's) for our little people and salami (Freybe's gf), peppers, and extra cheese for ours...I tried cooking it for 10 mins but it was still a bit mealy so I put it back on for 10 more mins. at 350 degrees Fahrenheit /170 degrees Celsius...YUM  my 5 year old ate 4 pieces!!! All of the children were excited to have PIZZA again!!! On another note...I was reminded by a special friend ...NOT to focus on trying to find substitutes for my faves from my glutenous past...but to focus on fresh new foods for our healthy future :)  Thanks Sheri <3

Monday, 20 February 2012

Bread that tastes like bread ??? Success???

Yesterday I decided to try yet ANOTHER bread recipe..I picked up some new all purpose flour from the new gluten free bakery...I think it's base was brown rice flour so the bread turned out a light purplish grey colour..with specks in it that looked like kiwi seeds...but when my second youngest (the reason for our switch away from gluten) said WOW!  It's BREAD!!!  I knew it would be a hit...I have a few more to try and who knows what it will be like now that it is cold...but she identified it as bread...so here is the recipe...


Tolerable bread: 
If you don't have a bread machine, preheat your oven to 325 degrees.
  • 1 Tbsp. active dry yeast
  • 1 Tbsp. sugar
  • 1 ½ c. water (hot tap water, but not too hot, or the yeast will die)
  • 2 ½ cups Gluten-Free All-Purpose Flour Mix
  • 2 tsp. xanthan gum
  • 1tsp. salt
  • 2 eggs 
  • 1 ½ Tbsp. oil
  • 1 tsp. white vinegar

  • 1. Mix the yeast and the sugar in a small bowl. Blend with a fork and set aside until it starts to bubble...about 5-10 mins.
    2. Combine the flour, xanthan gum and salt in a large bowl, making sure it's well blended.
    3. In a third bowl, whisk the eggs, oil and vinegar until the eggs are a bit frothy.
    4. The yeast should be bubbly by now, so you can add all of your wet ingredients to the flour mixture. Stir until all ingredients are well mixed. You don't need to knead this dough. You'll notice with gluten-free mixes, it's more of a cake-like consistency.
    5. If you have a bread machine, you can dump it in there at this point and cook on the 80 minute setting. You don't need the paddle. If you don't have a bread machine, place the bowl in a warm place with a towel over it.  Let the dough rise for about 45 minutes or until it doubles in size. Then place it in a loaf pan and cook until a toothpick comes out clean, about 40 minutes.
    Add butter and ENJOY!!!
    Today I will try this recipe and another using regular gluten-free all purpose flour..

Sunday, 19 February 2012

The quest for bread that doesn't taste like gritty playdough...

I guess the key to gluten free living is to change my thinking somewhat.  I can NOT try to make my diet the way it was by finding gluten free substitutions...as I have been doing...I need to start a journey with gluten free recipes and learn a new way to cook and live ...leaving my old ways behind...Here is the story of my ongoing quest for tolerable gluten free bread...
     I started out by trying those breads in the freezer section of the grocery store...ewwww...except for Udi's hot dog buns..toasted they are heavy but CLOSE to the real thing...and the okay  bagels from Glutino...again they MUST be toasted..
     Then I went onto bread mixes...also hugely disappointing ...except for Celimix bread mix which isn't very good for bread but definitely YUMMY for pizza crust!!  I made the bread recipe following the package directions and after letting it rise, drenched my fingers in rice flour and spread the dough on a pizza pan...it is VERY sticky and has a consistency of thick toothpaste but with the flour on my fingers I spread it and then added Daddy's special spaghetti sauce...(see recipes),  cheese and Grimm's gluten free lunch meat (salami, pepperoni etc...) and Mozzarella cheese...My family LOVED it!!!
     Next I started surfing the net for the "best bread recipes"...the $45 hot dog buns was the best bun type recipe so far...tolerable and even yummy right out of the oven...not so good two days later....I tried a few others but have not been pleased...ONE.. I didn't even eat :(   I have started to notice the the old school gluten free people try to avoid potato and tapioca flours and go more for the starches...some recommend psyllium husk be added and many make their own all purpose flour blends...
     I even drove many miles/km out of my way to find a bakery ...one bakery said gluten free but when I got there I found that she meant wheat free...not necessarily gluten free...only wheat gluten free...WHAT???   the other bakery (just opened two days before) only had baked goods so far..but WOW! cupcakes that would rival any other cupcake and brownies that were perfect!!  I purchased some of their all purpose flour and went in search of more online recipes...sigh...why cant my middle daughter eat rice cakes???

Saturday, 18 February 2012

Daddy's special Spaghetti sauce

Ingredients:
1 to 1.5lbs/ .5 to .75 kg of ground beef, chicken or sausage
(for vegetarian substitute 1 c. grated zucchini or 2c. fresh spinach)
1 c. chopped bell pepper
1/2 c. chopped onion
2 stalks of celery
1 can of mushrooms (sliced pieces drain off water and discard)
1 large jar Prego spaghetti sauce with mushrooms
2 cloves of garlic finely chopped or one tsp. of pre-chopped garlic from a jar


Brown 1.5 pounds of ground beef or ground chicken or sausage meat (breakfast sausage squeezed out of the casing is our fave) in a large pot or electric frying pan set at medium heat.
Chop: onions, bell peppers, celery into bite sized chunks and add along with garlic to browned meat and continue frying for 5 to ten minutes. Cover the pot/pan and stir regularly
Add 1 jar or Prego spaghetti sauce with mushrooms and also the can of mushrooms with the water drained off.
Replace lid and cook at med/low heat until veggies are soft, stirring occasionally.

Serve over brown rice or corn spaghetti cooked as per package directions and RINSED WITH COLD WATER.
Use this sauce in our Gluten free lasagne recipe :)

Gluten free YUMMY meat lasagne

Home-style meat lasagne (for vegetarian option  substitute grated zucchini or cooked spinach or both for ground beef.  ALSO good with sausage meat or ground chicken)

Ingredients:
Alternating layers of:
Daddy's special spaghetti sauce (see blog for recipe)
Brown rice lasagne noodles cooked as per package and RINSED with COLD water.
Cottage cheese mixture (cottage cheese mixed with one egg and 2T fresh or 1T dried parsley)
Grated mozzarella cheese

In a 9x13 pan spread two layers of lasagne noodles placed with no spaces in between the noodles.
Spread sauce over the noodle layer (about 2inches/5cm worth).
Add another layer of noodles.  Spread the cottage cheese mixture over the noodles.  Add another layer of noodles and top with another layer of sauce. Cover with a GENEROUS amount of grated mozzarella cheese.

Bake in a 350  F / 176 C   oven for 30 to 35 mins.  Let stand for 35 mins.
ENJOY!!!  YUM!!